I get asked a lot, “How do I get started with a garden?” Well you are in luck because I am starting 2 raised beds and would love to have you follow right along. So get ready, get set, let’s garden! Fall is my favorite time of year to build/add to my garden because the beds have time to “settle or marinate” before planting time!
I am a huge fan of raised beds. I can’t express to you properly
how much better your plants will grow, how much easier controlling weeds will be and over all how much more you will enjoy your garden if you will construct some raised beds.
Let’s get started!
Step 1:
Find the perfect place. Vegetables need at least 6 to 8 hours of sun. It would be best if you find a place you can see from your house or pass by everyday. Out of sight is out of mind! You will be much more likely to water veggies you see wilting. Why not try your front yard like I did;)
Step 2:
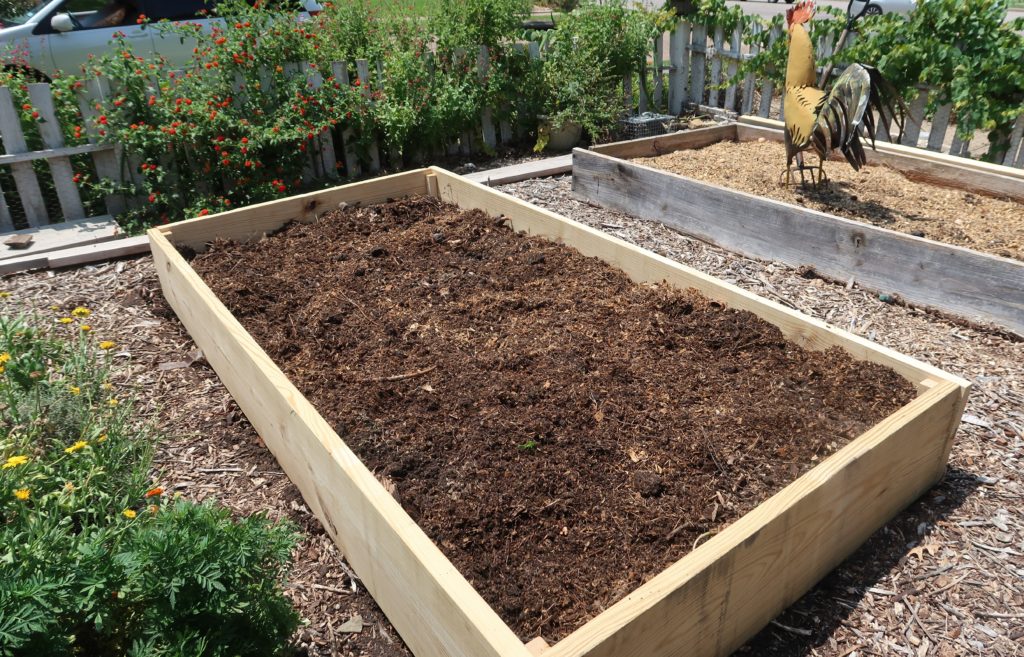
I made my raised beds 8 x 4 ft & 1ft high. Go to your neighborhood lumber store and buy enough lumber for 2 beds. Start out small. Don’t bite off more than you can chew! I bought pine, as cedar is just too pricey, but cedar would last longer. You can even get the store to cut your boards for you with their cool laser guided saw! Pick up a a box of 3 inch deck screws. Haul it all home, borrow someone’s drill if you have to and put together your 8′ x 4′ beds. Adding 2×4 sections cut the height of the bed, in the corners of the bed, will add support & help them last longer. Your new beds will cost you somewhere around $70.00.
Step 3:
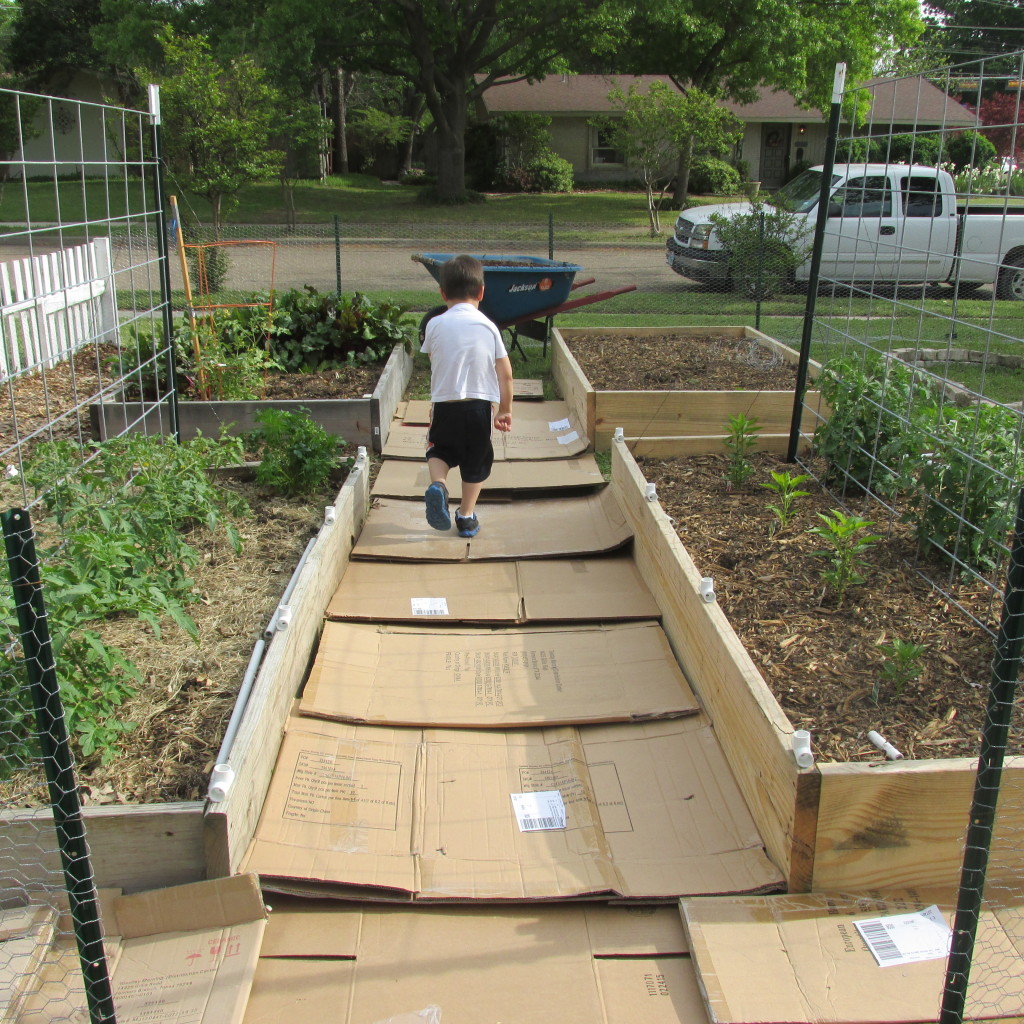
Lay down cardboard. It is a good idea to lay some cardboard boxes down first so you don’t have a problem with grass growing up. If you live in a place with bermuda grass then you will have to lay down cardboard & mulch around the beds also. You DON’T want that grass growing under the wood & into your beds! (If you don’t know what bermuda grass is then count yourself lucky!)

Plan your garden with the BIG picture in mind. Leave at least 3 ft around your beds. As your garden grows, like mine did, you will want to be able to get a wheel barrel in & room to get around each bed when the fence is up!
Step 4:
Fill up your new beds:
Start with 2 bags/or wheel barrels full of shredded wood chips on top of cardboard- at the bottom of each bed to help retain moisture.
Then add:
1 part compost, 1 part peat moss, 1 part perlite, 1 part top soil/or soil from your property.
You can buy soil in bags from your local nursery or my favorite option; visit Living Earth Technologies. See locations here. They sell soil mixes and will even deliver if you don’t have a truck you can borrow. My favorite is the vegetable mix, which will run you about $45.00 per cubic yard, or a slightly less expensive mix is the planting mix at about $35.00. You will need 1 cubic yard to fill both 4 x 8 beds half full.
This might seem like a lot of work and a big expense, but if you build this good foundation you will have a beautiful garden and yummy healthy veggies for years to come. Total cost around $150.00.

Creative/out of the box way to fill your raised beds:
If you have made your own compost, use that. However, if you don’t have any compost of your own, go on Craigslist and see if someone has horse manure free for the taking. I met a super nice lady that had a big pile of aged horse manure on her property. A few shovels and some strong boys & my truck was filled with great compost;)
Step 5:
Protect your new garden area from rabbits. A short fence would be ideal. Putting chicken wire 1ft up on the fence should keep those rascally rabbits out. See how I built a fence around my garden out of free pallets here: https://bloomwhereyourplanted.com/how-to-create-a-beautiful-picket-fence-out-of-pallets/ If you can’t build a fence, then protect with chicken wire attached to the wooden sides of the bed. I started with two raised beds in my front yard. Since I did not want to commit to a fence right away, I covered my beds with chicken wire. Once the plants were established the rabbits didn’t bother them so much, but they always love new tender shoots of just about anything!
What if your budget to build a garden is VERY, VERY small?
Don’t let this stop you! I was in the same boat as you are. I thought outside the box and I asked a few friends if they would be willing to sponsor me. This means that they would shell out the cash up front in exchange for Fall or Spring veggies delivered every other week for a season. Pretty sweet deal for all involved. I always put in the disclaimer that, in gardening things can happen, from pests to early freezes, but they were willing to take that risk. Another up side for me was that it was very motivating growing veggies to share with someone else. Things that you might let slip by for yourself you will make time for when someone else is involved. Am I right?
Finding a source for scrap materials like lumber or tin would also be a low budget way to construct your garden.
Congratulations! You did it! You are ready to plant. For years I bought my plant starts from my local plant nursery; this is a good way to get started with your new Fall garden. They should have lots of cool season starts you can have fun with!
If you are ready to jump into seed starting for your Spring garden then check out this post with video: https://bloomwhereyourplanted.com/secrets-to-getting-that-spring-garden-started/ It will ensure that you get a seccessful start to growing your own food!
If you have any out of the box ideas for starting a new garden then please share them in the comments. We can learn from each other!


